• Skip to main content
  • Skip to primary sidebar

ICC Floors Plus Blog

Cabinets. Countertops. Paint.

  • Home
  • Blog Home
You are here: Home / Archives for Design

Design

The Design Process and What to Expect

May 4, 2019 by iccfloors Leave a Comment

Beginning the design process can seem a little intimidating at first, but it is a new opportunity to express yourself through design.  Whether you are redesigning, renovating or building a home from scratch, every design comes with its own set of circumstances. That is why it is essential to approach every design with an organized game plan for a successful finished product.  Unfortunately, failing to plan can sometimes lead to unpreparedness and interruptions.  Our team is dedicated to creating a pain-free process to help transform your home and bring your dream oasis to life.  To help you stay prepared, here is everything you need to know when beginning the design process: 

Envision

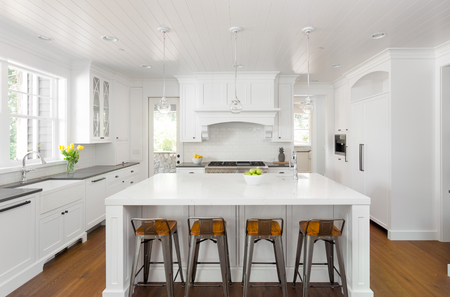
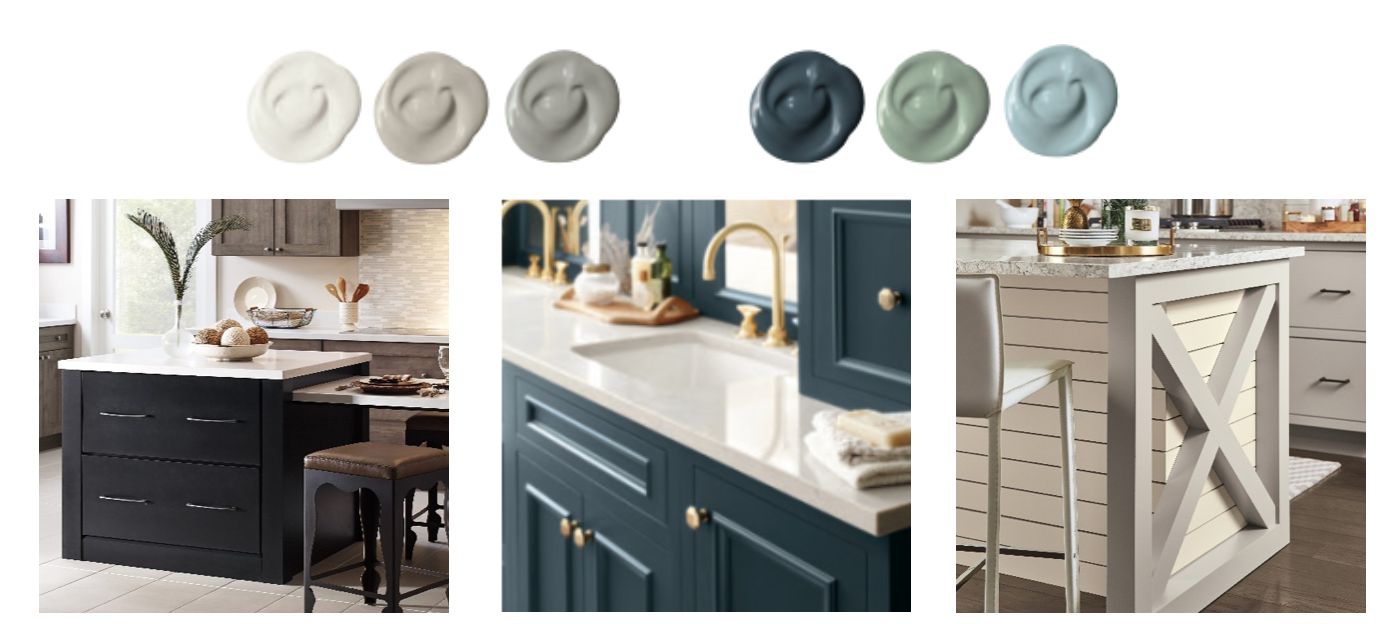
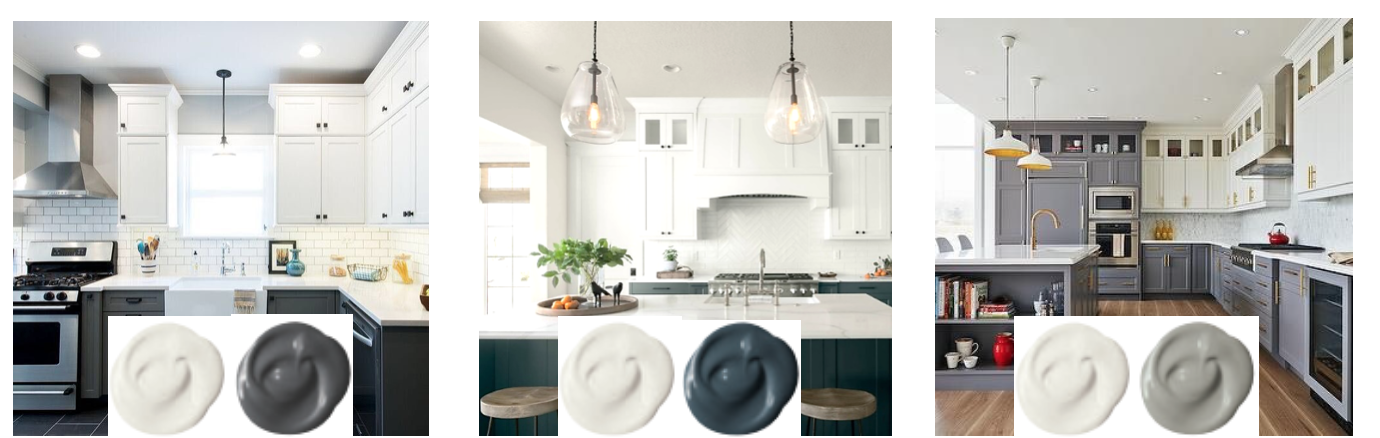
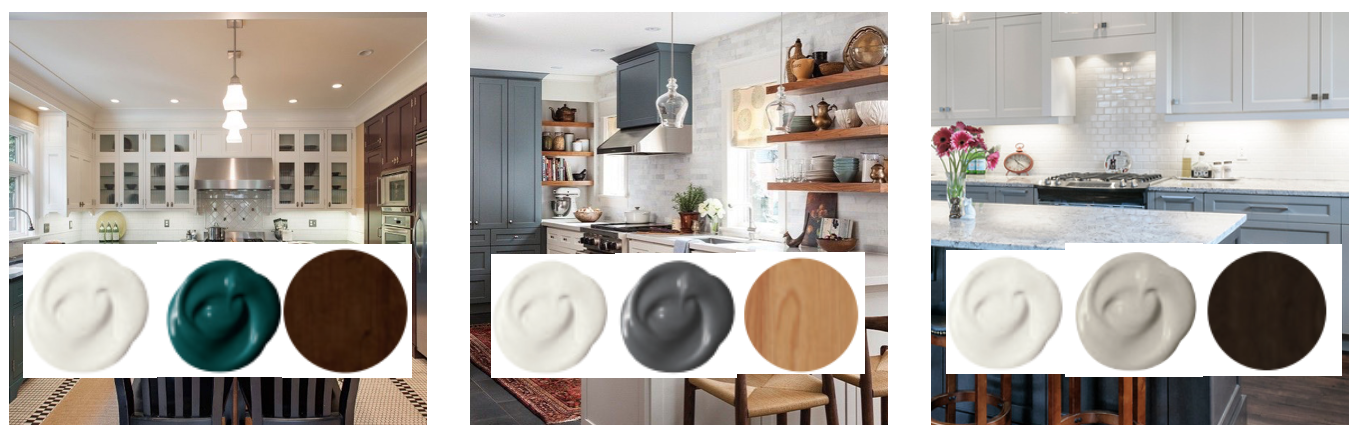
What do you want your design to say?  Are you aiming for a comfortable oasis to entertain guests or chic and sleek fixtures to make your guests “ooh and ahh.” Simply put, at ICC Home, we want to bring your dreams to life.  To help our expert sales staff fully grasp what you want to accomplish, we recommend bringing in some of your favorite ideas. You can explore our showroom or create a mood board to gain inspiration and gather ideas you want to incorporate in your design.  You can create a mood board digitally by saving pictures or pinning ideas you are looking to replicate.  Just be sure to find designs that feel tailored and expressive of you because the environment you create is a reflection of yourself.

Establish and Adapt

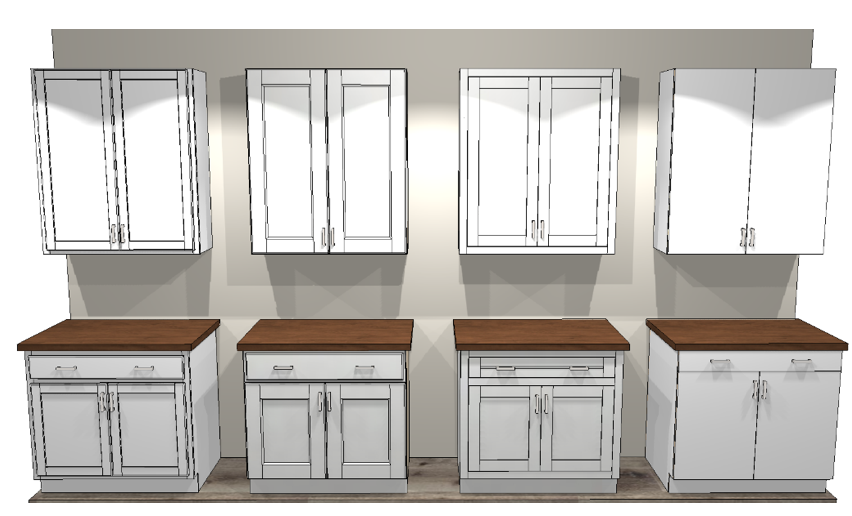
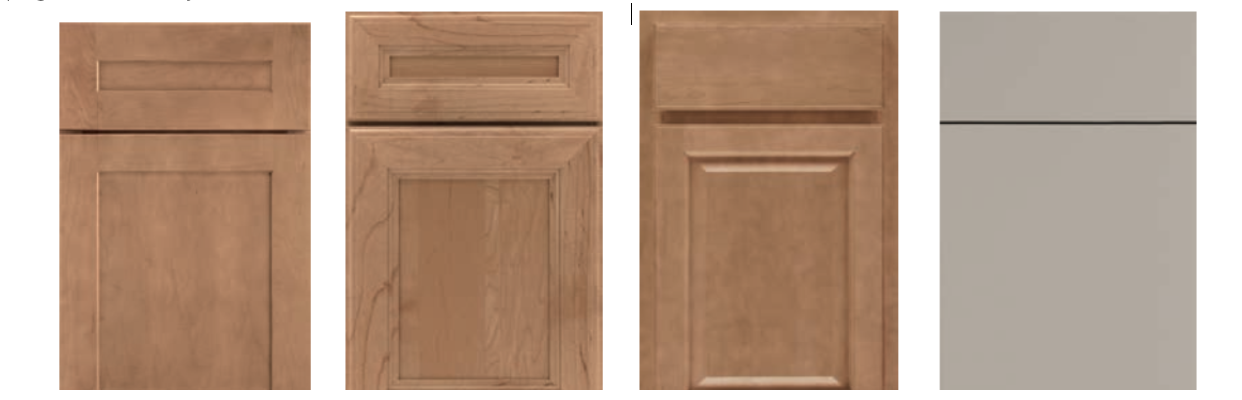
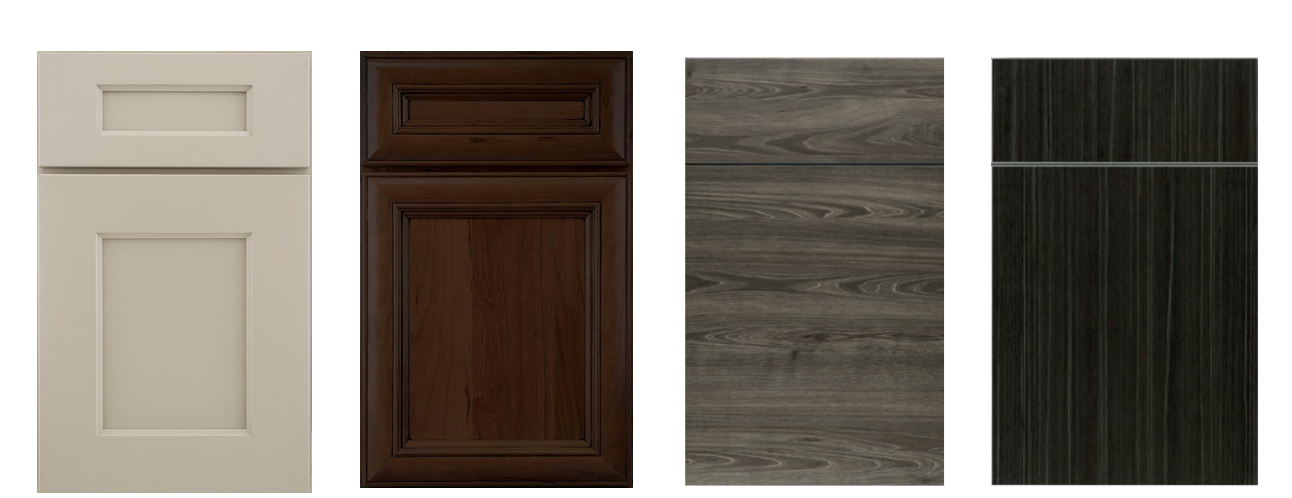
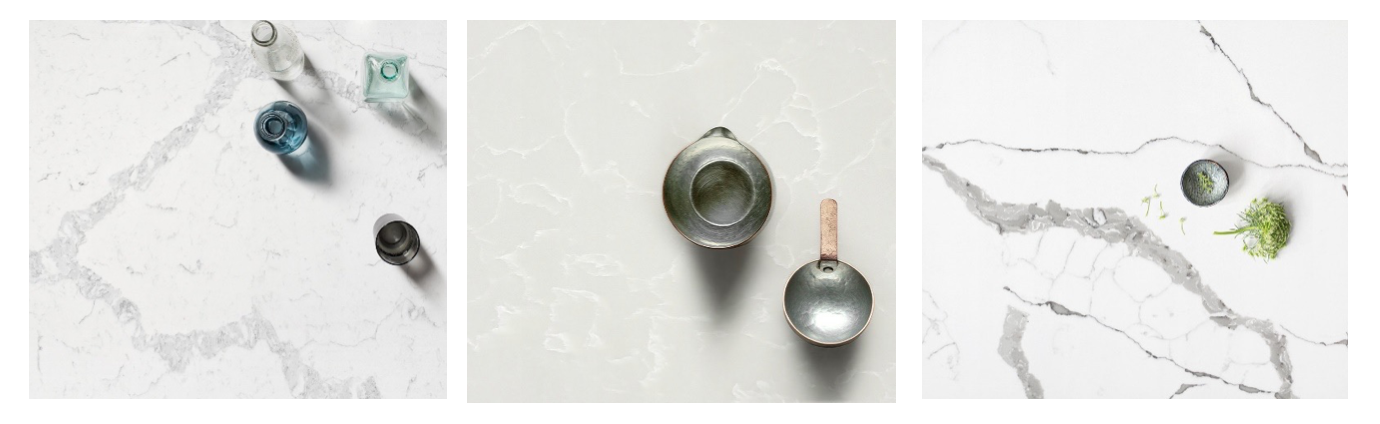
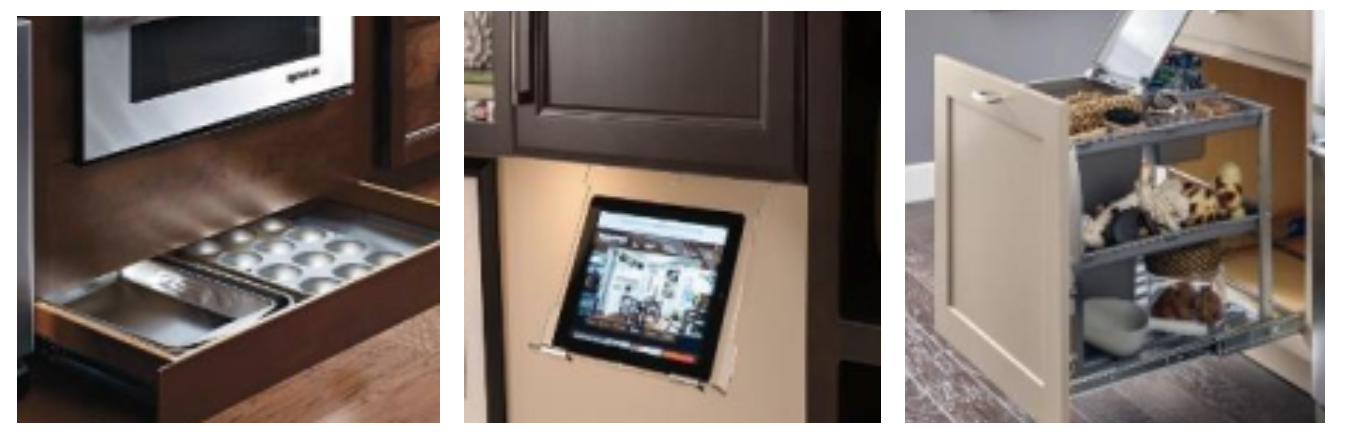
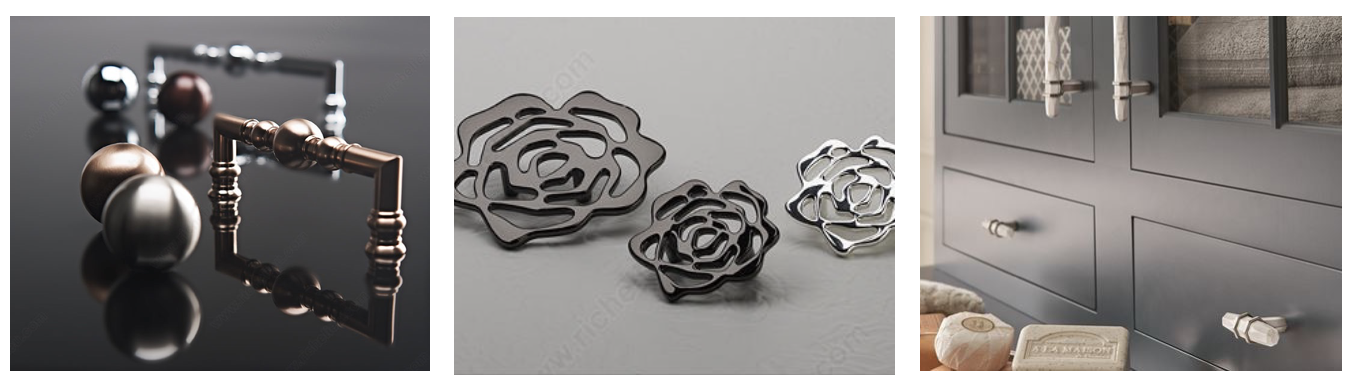
Next, you will want to establish a style you are looking to create.  There are hundreds of design themes to use as references (Minimalism, Art Deco, Rustic, Modern, etc.).  Create a budget and establish what the room’s purpose will be.  After, you will want to find products that create your atmosphere and reestablish your purpose.  But no need to worry, because we will help guide you in selecting the perfect colors, materials, flooring, cabinets, and more.  

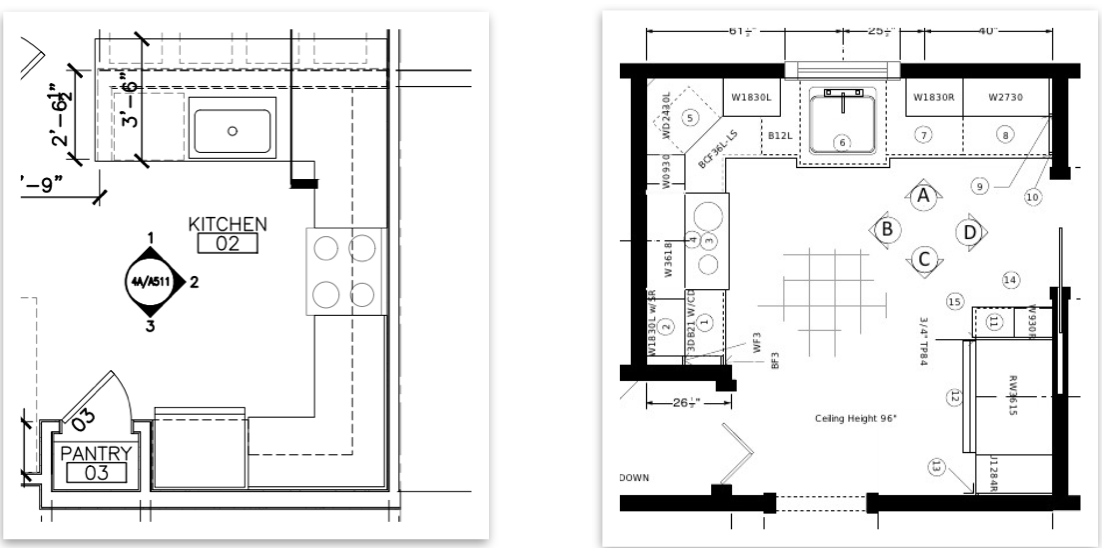
As a reminder, some products may not work in every atmosphere so you may need to adapt some planning.  For example, you may not be able to put hardwood over a slab or knock down a support wall.  Adapting your vision to work with your home’s blueprint and architecture can be an essential part of the design process.

Transform and Create

Next, in the process, we will begin to create and transform your home. By providing a one-stop-shop, we hope to create a smooth design process and keep you updated along the way.  We understand that the remodeling process can be stressful, but we will create a pleasant experience with an expert team.  Bringing your dreams to life is our goal.

This simple three-step process is all it takes.  So, start collecting ideas today, and envision your dream home.  Let us establish the plans together as we transform your home into a paradise.

Filed Under: Design Tagged With: design, design process, redesign, remodel, renovate, what to expect

Where to Begin: Home Remodel

December 14, 2018 by iccfloors Leave a Comment

Whether you have just moved into a new home or you are just looking to renovate your home, remodeling your space can take a significant amount of time and come with a price tag.  It is best to have a general sense of everything you want to accomplish in your home before you start; however, tackling every room and every desire at once may not be feasible.  You will need to decide what your remodeling priorities are and make sure you direct your initial efforts towards those areas at first.  We put together some simple guidelines to help you establish where to begin in your home remodel and how to access it along the way. Let’s take a look! 

The Essentials

First things first, always start with the essentials.  Do you have a room in your home that the remodel or renovation is essential to your living environment?  Perhaps, a room has broken appliances, or you have a child on the way.  Always start your remodeling with rooms that need to be done and have a deadline. This is where you will need to start.

Most Facilitated

What rooms do you use the most?  It will not make sense to start with the guest room if you have never had guest over to your home.  Start your remodeling process with the rooms that you are always spending the most time.  It will be difficult with these rooms out of commission during the remodeling process, but they are a smart starting choice. Trust us, you would much rather spend a majority of your budget on frequently-used rooms rather than unused ones. 

Important to Your Lifestyle

Next, look at the room that is most suitable for your lifestyle.  If you work from home, you may want to finish the office next.  If your lifestyle has you spending a lot of time in the kitchen meal prepping, this may be a suitable room to remodel.  Look at your home and locate the spaces which the remodel or renovation will help make your lifestyle easier.

The Want List

Lastly, you should make your “Want List.”  This is the room you can live without, but you really want in your home.  Maybe a home theatre, a man cave, a home gym, or a music studio.  If these choices fall into benefiting your career, move them out of the want list, but most of our want lists are solely extras. This will be one of the most satisfying ones to complete and remodel but should be saved for last like dessert. 

Remodeling your home takes time and money.  Every project can be as big or as little as you want. Decide how large you want your projects to be before beginning.  To help maintain a budget and peace of mind, complete each task before beginning a new one. 

Are you ready to begin your remodel? We would love to help you with all of your remodeling needs here at ICC Home, where we hope to be your one-stop-shop. Visit us or call us for more information. We look forward to working with you! 

Filed Under: Design, Remodeling

Understanding Floor Plans and Cabinetry

December 7, 2018 by iccfloors Leave a Comment

Floor Plans

When reviewing a floor plan designed by an architect or interior designer, you will notice in the kitchen area various line types depicted in the drawing.

On commercial, multi-family, or residential builder drawings, base cabinets are shown as solid lines, and wall cabinets are shown as dashed lines (See Fig. A). Wall lines have thick outlines but are not filled in.

On residential drawings, particularly in association with the NKBA, or National Kitchen and Bath Association, base cabinets are shown as dashed lines, and wall cabinets are shown as solid lines (See Fig. B). Unlike in commercial drawings, wall lines on residential plans are typically filled in except where a door or window is shown.

Figure A                                                                                          Figure B


To indicated specific cabinets, nomenclature is shown to represent the type of cabinet and size or width and height. Depending on the manufacturer, cabinets are available in various width increments as well as height for wall cabinets and tall cabinets. For instance, on a kitchen floor plan, you will typically see a base cabinet labeled SB36, B30, 3DB24, and W2442. What the nomenclature above means:

  • SB36 = SB stands for Sink Base and 36 means the cabinet is 36” wide.
  • B30 = B stands for Base and 30 means the cabinet is 30” wide.
  • 3DB24 = DB stands for Drawer Base, 3 in front means it there are three drawers on this cabinet, and 24 means the cabinet is 24” wide.
  • W2442 = W stands for Wall, 24 means the cabinet is 24” wide, and 42 means the cabinet has a 42” height.

Cabinetry

There is a multitude of cabinet styles depending on which manufacturer you are designing with. Within each manufacturer, there are a variety of overlays, door styles, wood species, and finishes.

Overlay means how much the cabinet door covers the face of the cabinet, also known as the face frame. There are four main types: traditional, full, inset, and frameless. A traditional or standard overlay shows a 1” to 1-1/2” of the face frame with center stile shown between doors on a cabinet which has two doors. This is also known as a partial overlay. Some manufacturers allow the doors to butt up next to each other leaving a 1/8” gap, where others do not have this option and simply show the center stile. Full overlay shows a ¼” or less of the face frame, allowing the doors to fully encompass the face of the cabinet. Inset shows the cabinet door flush with the face frame, allowing a 1/8” or smaller gap around the door to minimize rubbing. This style can come beaded or non-beaded face frame, and with concealed or non-concealed hinges. Frameless does not have a face frame, and the doors cover most of the cabinet box. The hardware is mounted to the box and allows full access to the cabinet unlike a full overlay where the face frame uses depth space by ¾”.

                Fig. C: Overlays shown Left to Right: Partial/Standard Overlay, Full Overlay, Inset, and Frameless)

Door styles can range from a raised panel, flat panel, slab, miter, beaded, applied molding, and shaker, with the most popular being shaker.


                              Fig. D: Door Styles shown Left to Right: Shaker, Miter, Raised Panel, Slab.

Wood species can range from oak, hickory, alder, walnut, maple, cherry, laminate, melamine, acrylic, thermofoil, and MDF, with the most popular and most versatile being MDF. MDF, also known as Medium Density Fiberboard, is not to be confused with furniture board or thermofoil. MDF is a composite wood product, performs well in areas where humidity levels vary during the year as it does not expand and contract like solid wood does, and can be painted. Thermofoil is a laminate product, it has limited door styles and usually available only in white. The product ages with time, causing a yellow tone to appear and if in areas with high heat exposure and water splashing, it can cause a ripple or bubble appearance underneath the finish.

Finishes can range from painted, stained, embossed or heavy textured, or gloss laminate, with the most popular being painted finishes.

(Fig. E: Finishes shown Left to Right: Painted, Stained, Embossed, and Gloss Laminate)

2018/2019 Trends in Cabinetry:

Finishes

Painted finishes are in high demand, especially in white and grey tones. Some designs are accenting specialty areas such as bathroom vanities or bars in colors such as navy or olive green, and the resurgence of medium to dark stains in areas such as hoods, floating shelves, or islands.


 Photo Credit: Schrock’s Marketing Site

Mixing Finishes and Styles

Two-tone color schemes have been around for a couple decades, usually done with the perimeter and island in separate colors. The newest introduction is mixing two finishes in one area, for instance, the base cabinets and wall cabinets are in separate colors creating a two-tone at an area like the perimeter.

        Photo Credit: 1. Fosterhill Design 2. Tradewinds General Contracting Inc. 3. Rebecca Hay Interior Design

Three and four tone color schemes have emerged introducing a third and fourth finish, accenting as a wall hood, tall cabinetry, floating shelves, or an island. Four tones are fairly new to the market, though this can be done by using complimenting paint and stain colors for walls, talls, and base cabinets throughout the design. For instance, perimeter wall and tall cabinets are light (white), perimeter base cabinets are dark (navy blue), island cabinets are dark stained wood, and accenting floating shelves or wall hood are medium stain with a dark glaze to pull in the island finish.


         Photo Credit: 1. Fradkin Fine Construction 2. House and Home Photography 3. Teresa Pollen Photography

Countertops

Gone are the days of dark countertops. Not to say there are still kitchens being designed with dark countertop finishes, but homeowners want their kitchens to feel light, bright, and clean. Enter quartz, depending on the manufacturer, this is a man-made material with a mixture of natural quartz. The designs are beautiful, resembling marble without the marble price or maintenance, and the durability is comparable to granite. However, it is not natural stone, so it does not tolerate heat as well as granite and the slabs are all the same. No hunting through the slab yard for the perfect one.

Photo Credit: ColorQuartz

Storage Solutions

We can never have enough storage, and options for interior accessories have grown in the past couple of decades. Not only can you get trash pullouts, drawer pullouts, lazy susan, and cutlery dividers just to name a few, but you can get a vacuum or extra tray storage in your toe kick, a tablet holder for underneath your wall cabinets, and pet feeding station if you have pets. The options are endless!

 Photo Credit: Schrock’s Marketing

Hardware

The rise of gold, all shades of gold whether it’s polished, champagne, rose, bronze, or aged. Not to be confused with brass, a popular finish in the ’80s and ’90s, now gold finish has a more refined, true gold color. Bronze and Nickel will never go out of style, although these finishes are getting makeovers of their own. Bronze is embracing a warmer, lighter tone, and nickel is trying a darker approach and going black or even graphite with matte finishes. Marble is also making its way into decorative hardware, paired with metal finishes and geometric shape.

Hardware is the jewelry of cabinetry, it’s a way to express your style without the worry of being permanent. It is also the easiest, least expensive way to revamp existing cabinetry.

Photo Credit: 1. Richelieu 2. Richelieu 3. Amerock

To learn more about our cabinetry selection, please visit us here. For countertops, click here. As always please let us know if you have any questions, you can call or visit us for more information. Thanks for reading!

Filed Under: Cabinetry, Design

Choosing Color

July 19, 2018 by iccfloors Leave a Comment

Think about it. There are an infinite amount of paint colors out there. It can feel like a lot of pressure to choose the “right” one. If you are stressed out and do not know where to start, you do not need to worry. We are here to help! With our top five tips, you can have ease of mind while selecting your colors. Let’s see how:

Choosing Color 101: 

1. One Sided. 

If you were to glance at a color wheel, you would notice warm tones on one side and cool tones on the other side. When you use colors within the same tone, you will discover it to be more visually appealing and well-balanced. It can look awkward or mismatched when you pair cool tone items with warm tone items; therefore, we recommend sticking to the color wheel’s tone placement.

2. Know The Terms. 

  • Monochromatic: the different tints and shades of one color used throughout a space. 
  • Analogous: the use of colors that adjacent to one another on the color wheel. 
  • Complementary: the use of two colors that are oppositely located from one another on the color wheel. 

3. It’s Finished. 

A paint’s sheen/finish can actually be an essential part of the decision process. There are a variety of options to choose from including: 

  • Semi-Gloss: reflective
  • Matte: durable
  • Flat: low sheen

4. Accent It. 

Think of colors that will go well with your initial color. You want to accent it with visually pleasing colors. Design experts recommend going from light to dark. You would ideally like your floors to be the darkest, walls to be the medium shade, and ceiling to be the lightest. Within the shades, look for hues that complement one another. 

5. How’s It Look?

Wow, can a color change in different lighting. Light can play an important role in a color’s appearance. You will want to sample the color in different lighting (artificial vs. natural) to ensure that you like it.

  • Pro-Tip: Be sure to sample your paint color in different areas of the room, which all receive different amounts of lighting. It will help assure you that you truly love your color choice. 

Do you need more assistance in choosing the perfect color? We would love to help! Stop by our showroom or call us for more information. 

Filed Under: Design

Remodeling Your Home

June 13, 2018 by iccfloors Leave a Comment

Remodeling your home in order to sell it can be a challenging process. There are several factors that you will want to take into consideration when remodeling. To help our customers before they begin their remodel, we have created a remodeling guide. We have compiled four simple tips for transforming your space into a buyer’s paradise.

Tips for Remodeling Your Home:

  1. Hit The Bullseye. It is important for homeowners to know their target market when selling their home. Your home is not just about you and your preferences anymore. You are trying to make your home into someone else’s dream and help them to realize that they belong living in it. In order to do that, you need to take into consideration your area. Are you in a great school district? If so, that may attract younger families and you will want to make your home a family-friendly atmosphere. Make sure you provide extra storage to put a mom’s mind at ease. If you are in an older resident community, you will want to target those buyers appropriately as well. Make sure that your home has slip-free surfaces to help them feel comfortable living on their own.
  2. Fit In. This is the one time that we will say that being “average” is better than being “different.” You will need to have a firm grasp on your neighborhood and the homes in it. You do not want to be the most expensive house on the block because odds are you will not see a return on investment. Take some time to research your area and the prices of homes in your neighborhood.
  3. Be Accurate. You want to invest in the rooms that buyers find most important; therefore, you will want to focus on the kitchen and bathrooms. Buyers know that it is an easy fix to change the bedrooms, but they want a good kitchen and bathroom. Plan your budget to incorporate changing these rooms. They are essential in the home buying process. But be aware, you do not want to go overboard on upgrades in these rooms. These rooms are the most expensive to upgrade; therefore, you will want to make conscious upgrades within your budget. Take some time to see what needs to be done.
  4. Always a Classic. Instead of going bold and trendy with upgrades, stick to the classics that everyone enjoys. Odds are that you will find a buyer who will appreciate these classic factors of your home. If you are uncertain about something, ask your contractor for their advice. They have seen the ins and outs of this industry and their advice can really help.

We hope you enjoyed these four simple tips and if you are looking to upgrade your home’s flooring before you sell, we would love to help you. Please look around our online catalog for a convenient shopping experience right at home! 


Filed Under: Design

How to Successfully Decorate with Neutrals

June 8, 2018 by iccfloors Leave a Comment

Decorating with neutrals may seem easy, but we have six tricks that you may want to consider before you begin your next design project. Let us take a look! 

How to Successfully Use Neutrals in Your Design:

No. One: Warm vs. Cool Tone. 

Before you begin exploring all neutrals have to offer, it is important to understand that there are two different types of neutrals: cool tone and warm tone neutrals. The undertone of neutral colors will determine whether or not they are in fact a warm or cool tone. If the undertone consists of browns, reds, oranges, or yellows, the neutral is warm toned. If the undertone consists of blues, purples, or greens, the neutral is cool toned. Once you have decided on your undertone, it is imperative to decorate with that color scheme throughout the room. This will help make sure everything is consistent and flows properly. For example, if you go with a warm-toned neutral, you will want to pair the decor with warm tones color like red or brown. This will create the seamless look you desire. 

No. Two: The Perfect Backdrop. 

Neutrals are incredible backdrops because they do not take away from the room. When in doubt, select a wall color that is a neutral and you can rest assured that the rest of your room’s design will blend seamlessly in with the wall color. 

No. Three: Layers. 

It is important to layer different textures and patterns in neutral colors. If you only have neutral solids, your room may feel bland and uninteresting. Instead, layer textured pillows, blankets, and even rugs to create depth and appeal. 

No. Four: Contrast. 

You will want to add some contrast to your neutrals to make sure that you create a well-rounded room. Be sure to use both dark and light colors throughout your space for a timeless look. 

No. Five: Light vs. Dark Paint. 

Neutral walls can either be light or dark. There are benefits of choosing both values. Light walls can create a clean, sophisticated look, while dark walls can create a sultry, romantic, and cozy vibe. It really depends on which look you are going for when determining which value you want to choose. 

No. Six: All Colors Have a Neutral-Side. 

You may be thinking that neutral tones just include beige, gray, greige, white and black, but you would be wrong. In fact, every single color can have a neutral side to it. You can have neutral pinks as well as neutral blues. They are duller than the normal “pink” or “blue” color, but they work well throughout a neutral-toned room. Just be sure that you pair them with their other cool or warm toned colors to make sure that it all flows together. 

How do you use neutrals throughout your space? We would love to hear your comments and feedback in the comment section below! 


Filed Under: Design

  • « Go to Previous Page
  • Page 1
  • Page 2
  • Page 3
  • Page 4
  • Page 5
  • Page 6
  • Page 7
  • Go to Next Page »

Primary Sidebar

Stay in the know!

Get emailed each week when there's a new post!

  • Email
  • Facebook
  • Pinterest
  • Twitter
  • YouTube

Search for any topic you’re interested in!

Categories

  • About ICC
  • Backsplash
  • Bath
  • Cabinetry
  • Colors
  • Countertops
  • Design
  • Events
  • Family
  • Financing
  • Floorish
  • Floors
  • Have a Dream
  • Holidays
  • ICC Home
  • Kitchen
  • Make it Happen
  • Meet the Team
  • Paint
  • Plan the Project
  • Remodeling
  • The ICC Family
  • Tips and Tricks
  • Uncategorized
  • Website Tools

Recent Comments

  • Alex on How to Style Throw Pillows Like a Pro
  • Zoe Campos on Countertop Care & Maintenance
  • Angel Burke on Encapsulating Autumn with Decor
  • Blake on Project Completion – Tile
  • Jason Seltzer on Project Completion – Tile

Recent Posts

  • Creating Multifunctional Spaces
  • New Products that Wowed at KBIS
  • What’s Most Important in a New Kitchen?
  • Kitchen Cabinet Trends: What’s Hot Right Now
  • A Trip to the Islands

Archives

Copyright © 2025 · Genesis Sample on Genesis Framework · WordPress · Log in